Laser
Using the laser at Leicester Hackspace.
This book is being actively updated.
- 📖 Introduction
- 🧑🧑🧒🧒 Users
- 💷 Fees
- 🖥️ Software
- ⚙️ Hardware
- 🚨 Health & Safety
- ⁉️ What materials can I cut/engrave?
- ✅ Materials that are safe to laser
- 🤔 Materials that probably shouldn't be used
- 🚫 NEVER LASER THESE MATERIALS
- 🛒 Recommended suppliers
- 📋 Operating the laser
- ⚡️Turning on the laser
- ✅ Pre-use checks
- 🎯 Homing the laser
- 🔎 Focusing
- 🏁 After you've finished
- ❌ Shutting down the laser
- 🛠️ Maintenance
- 👤 Contacts
📖 Introduction
Leicester Hackspace has a Piranha Ruida CO2 laser which was donated after it was seriously damaged by a fire caused by unattended cutting of acrylic. Members have coaxed it back into use. It has a number of idiosyncrasies as a result, so it is important that members are trained beforehand or supervised whilst using the laser.
Summary:
- Laser type: CO2
- Power: 100W
- Model:
- Bed size:
- Cutting area:
- Software: RDWorks v8
🧑🧑🧒🧒 Users
Who may use the laser?
🧑✈️ Pilots
Members who have been trained and authorised to use the laser are known as pilots.
Pilots are able to assist other members of the Hackspace to use the laser. You will need to book the laser and pilot by contacting them directly, usually through the laser channel on Discord.
Members who are pilots:
- Divya Pujara
- Steve Gale
- Neil Burley
- Keith Cummings
👟 Trainers
Members who wish to become pilots need to be trained first.
Members who are pilot trainers:
- Divja Pujara
- Neil Burley
💷 Fees
How much does it cost to use the laser, why, and how to pay
How much does it cost?
Laser use is charged at £10 per hour of contact time.
Contact time is defined as from turning on the laser to turning it off at the end of the job.
The fee is also due for the contact time during training. Training time depends on the experience the member already has, but will be a minimum of at least three hours.
Why do we charge?
As well as energy costs, the Hackspace needs to cover the cost of maintenance and repairs.
Example costs for information are:
- Lens replacement
- Tube replacement
- Cleaning materials
How to pay your fees
🖥️ Software
Things to know about the software used to run the laser
💾 RDWorks
The laser uses RDWorks v8 software.
As users are charged by contact time, it is suggested that you download the software to your own computer and become familiar with it prior to starting to use the laser. You should prepare your design in advance of your laser time slot, so that you are ready to cut straight away.
Download link for the software, drivers and manual: https://www.rdacs.com/en/download?type=software
Configuration files for the machine and material parameters can be obtained from the laser PC at the Hackspace.
🗂️ Importing files
⚙️ Hardware
Things you need to know about the laser itself
🚨 Health & Safety
Assessing the risks of using the laser and managing them appropriately
💨 Air quality
The extraction system for the laser is adequate, but not brilliant. Some members at the Hackspace are sensitive to the smoke and fumes created by cutting some materials, so the following rules are in place:
Before cutting
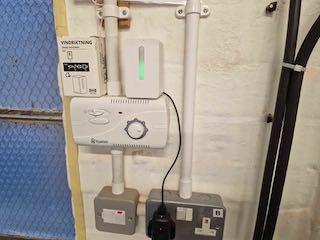
Check the air quality monitor behind the laser. If it is green, carry on. If it is yellow, be prepared to stop cutting if anyone in the room is affected by the smoke or fumes. If red, do not start cutting until the air quality has improved (ideally back to green).
During cutting
Continue to monitor the air quality and keep to the guidance above. You may need to pause the laser mid-job until the air quality improves. Please note that the monitor only measures particulates, so some fumes may affect others in the room without the monitor changing colour. This applies mainly when cutting acrylic or other plastics.
After cutting
Do not open the lid of the laser until you can see all the smoke has been extracted from the cutting area. After cutting acrylic, leave the lid down longer to ensure the fumes have also dissipated. Review the air quality monitor before your next cut.
🔥 Fire risk
Remember that there is only a laser in the space due to a fire caused by inattention. Any material that the laser will cut through presents an inherent risk of catching fire.
Before you use the laser
- Make sure you know what you are cutting is safe to use - see the material guide
- Follow any material specific guidelines to reduce fire risk, e.g. removing the protective plastic/paper on acrylic; making sure any paper masking is burnished and well-adhered across the whole area to be lasered
- Make sure you know where the fire blanket is and the nearest fire extinguisher
- Familiarise yourself with how to raise the alarm if a fire occurs
- Make sure the bed is clean and free of debris
While using the laser
- Know how to stop/pause the laser should a fire begin and what to do next
- Always stay in view of the laser and monitor the cut/engrave at all times using the camera
- Do not allow a flame to develop into a fire - deal with it straight away
- If cut out pieces fall in a way that will block the laser, pause and deal with them - a stuck laser or moving material creates a significant fire risk
After using the laser
- Remove your material from the laser and check it is not quietly smouldering - this is particularly important when cutting corrugated cardboard
- Remove all debris from the laser bed between cuts
- Clean the bed and blades thoroughly at the end of your session
👁️ Eye damage
The laser beam and reflected light are invisible and will damage unprotected eyes. Whilst the lid is down, the laser light is contained. Until a leather skirt is attached to the lid, there is a possibility of reflected laser light escaping from under it, so users should ensure no one is seated nearby or shorter persons/children are at eye level to the lid whilst the laser is in use.
Under no circumstances should the safety locks be tampered with or disabled. This ensures the lid has to remain closed at all times the laser is operating.
⚠️ RISK ASSESSMENT
Download link: #205 - Laser Cutter - 260819.pdf
⁉️ What materials can I cut/engrave?
What you can, probably shouldn't, and cannot under any circumstances put in the laser
✅ Materials that are safe to laser
These materials are 'safe' to laser, but are still to be considered a fire risk.
Please follow individual guidance for the material to reduce this risk.

Wood-based materials
Cutting these items will leave a sooty edge in most cases, which will wipe off with a dry cloth. The air assist can also blow this soot onto the top surface leaving a smudge, particularly with MDF (due to the vaporised glue). This can sometimes be removed by wiping over with IPA (rubbing alcohol) or sanding back to clean wood. If you need to use masking tape, make sure it is the paper version and is very well stuck down.
Paper and card
Consider using a sacrificial MDF board with tacky surface to hold down your paper or card to stop it blowing around. You may also consider designing your cuts with uncut tabs to hold any cut-outs in place.
MDF
Ensure your MDF is 'laser safe' - it will have less formaldehyde and glue and cut cleaner than the variety at hardware stores
Plywood
Ensure your plywood is 'laser safe' - it will generally be of a finer quality with smaller glue pockets. Glue pockets are notorious for not cutting through, potentially ruining an otherwise ok cut.
Fabric
Most fabrics are ok to cut in the laser. Organic fibres (e.g cotton) will take more power to cut through compared to man-made (e.g. polyester) - testing is crucial to get a clean cut with minimal charring or melting. Consider using a sacrificial board with a tacky surface to stop fabric pieces blowing away and keep them flat. IMPORTANT: you should not layer up fabric in an effort to save time, as this significantly increases the fire risk due to air pockets between layers and in creases.
Plastics
Not all plastics are safe, or appropriate, to laser. If you are unsure of the composition of the plastic, DO NOT LASER and ask for advice. Check out the 'never laser these materials' list as well.
Acrylic
IMPORTANT: remove any protective plastic sheets from the acrylic before you cut. If you need to mask, use a laser-safe paper masking tape that is stuck down and well-burnished to ensure adhesion. The commonest cause of fires when cutting acrylic is masking that lifts and catches alight.
IMPORTANT: vaporised acrylic fumes will catch light underneath the sheet. You must ensure that the bed is clean and without debris, as these flameouts can easily set fire to any leftovers on the bed.
EVA
Ethyl-vinyl acetate foam is ok to cut on the laser, typically used for cosplay
Mylar
Very useful to make stencils and masks from
Stone & Rock
Generally speaking, stone materials are fine to engrave. They will not cut. Be aware that the stone will become warm during engraving and will be a burn hazard.
Slate
Slate is great to etch in the laser, resulting in a white(ish) mark. Invert your image, particularly if engraving a photo (i.e. black lines will be the ones that engrave, resulting in a white marking). For extra contrast, use a polyurethane spray varnish to coat the slate at least 48 hours before lasering.
Poll icons created by Freepik - Flaticon
🤔 Materials that probably shouldn't be used
There are some materials that, whilst not on the banned list,
are problematic in other ways and should be avoided:

Oily or resinous wood
Pine, cedar, eucalyptus or teak woods have a high resin or oil content and will char excessively. They may ignite easily. Use untreated hardwoods such as maple or birch instead.
Reflective metals (not mirror-finished)
Aluminium, brass and copper may reflect the laser back along the optical path and cause damage to the machine. Metals will not cut using a CO2 laser. If engraving, use a laser safe coating and lowest effective power.
Corrugated cardboard
Air pockets within the corrugations increase fire risk. Monitor the cut or engraving carefully and continuously.
Foam board (paper-foam-paper laminate)
Foamboard will cut nicely on the laser, but... The paper coating will scorch, and the foam layer will shrink away from the cut leaving unsupported edges. There is a greater risk of fire due to the lamination and melting plastic.
Poll icons created by Freepik - Flaticon
🚫 NEVER LASER THESE MATERIALS
These materials should never be used in the laser.
This is not an exhaustive list. If you are not sure, don't use it and find out.

PVC, vinyl, neoprene, pleather, PTFE (Teflon)
When heated, these materials release chlorine or similar gases. This is a respiratory hazard, but also combines with moisture in the air to create acids which will seriously damage the laser through corrosion.
Polypropylene sheet and foam
Highly flammable and likely to catch fire whilst cutting
Coated carbon fibre
The resin coating can give off toxic fumes and is a significant fire risk
Mirror-finish metals
The mirror finish is likely to reflect the laser straight back along the laser path and damage the optics. A CO2 laser will not cut or mark metals anyway.
ABS plastic
Emits cyanide fumes when lasered and is likely to melt and burn rather than cut cleanly
HDPE plastic (e.g. milk bottles)
Likely to melt and burn rather than cut cleanly
Chromium tanned leather
Releases toxic chromium oxide fumes during laser cutting
Use vegetable tanned leather instead
Fibreglass
Both glass dust and resin fumes will damage the machine and cause respiratory problems
Expanded polystyrene/polystyrene foam
Very high fire risk, with toxic smoke
There are some foams, e.g. EVA, that are laser safe alternatives
Cured epoxy resins
High fire risk, with toxic smoke including cyanide and chlorine
Poll icons created by Freepik - Flaticon
🛒 Recommended suppliers
These suppliers have been recommended by members:
laserply.co.uk
kitronik.co.uk
hobarts.co.uk
📋 Operating the laser
How to cut or engrave something using the laser
⚡️Turning on the laser
- Turn on the plug near the computer area

- The cooler should beep as it powers up. If it does not, check that the unit is switched on before proceeding.
- Check the temperature displayed on the cooler behind the laser; it should be higher than (currently) 15°C. If not, do not use the laser. Also, check the temperature in the Hackspace: this should (currently) be greater than 15°C.

- Boot up the PC - password will be provided during your training
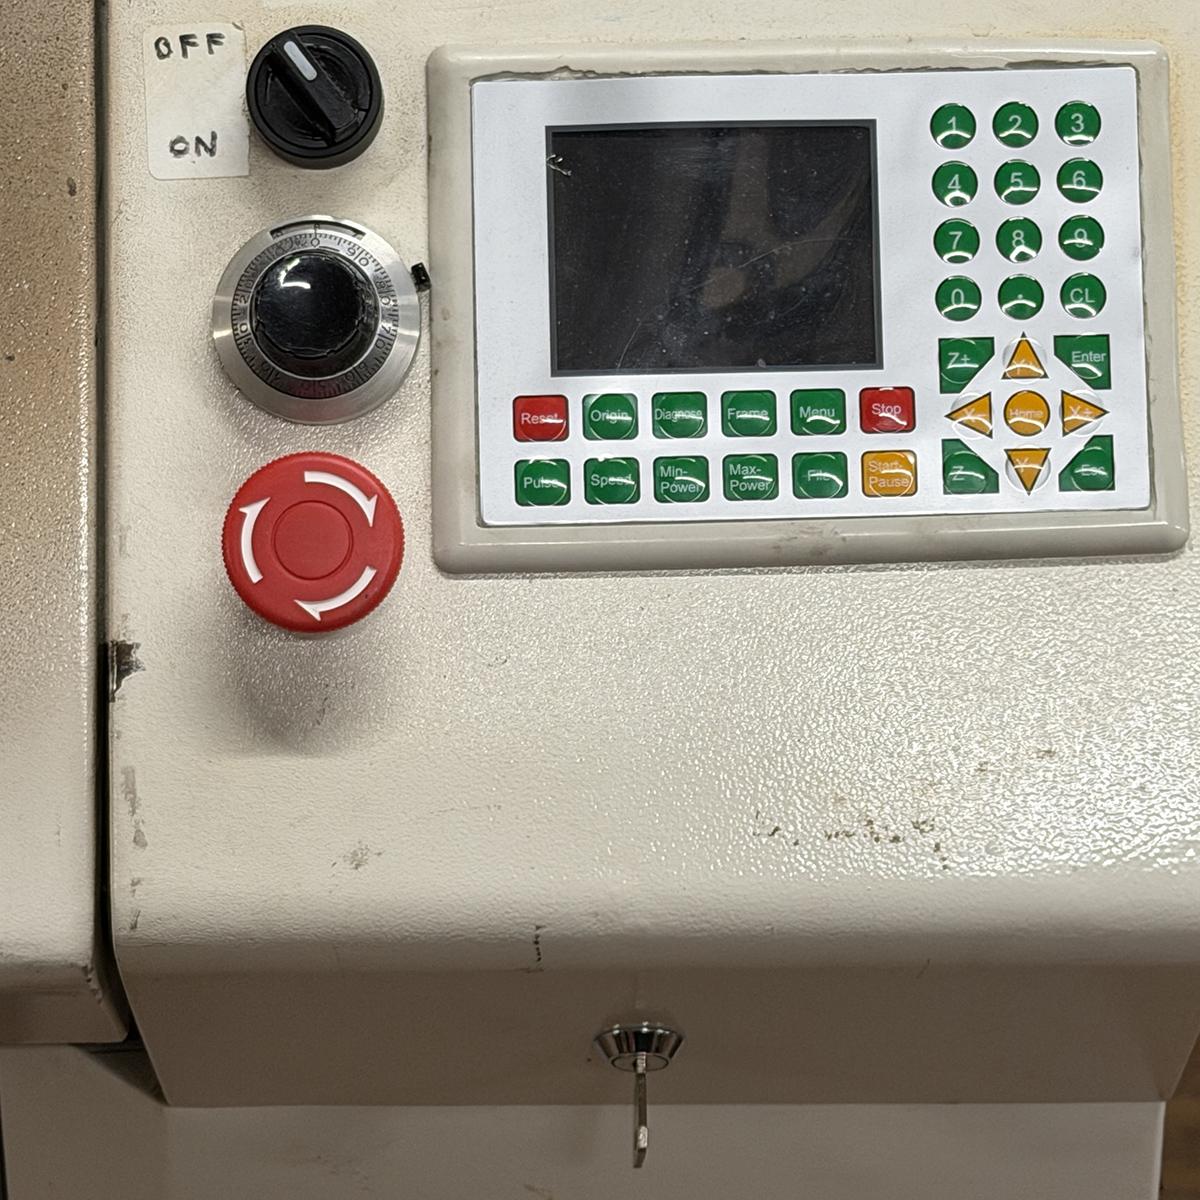
- Turn on all the switches on the side of the laser: leave a gap between closing each switch to avoid tripping the circuits. Not all the LEDs in the switches are working.

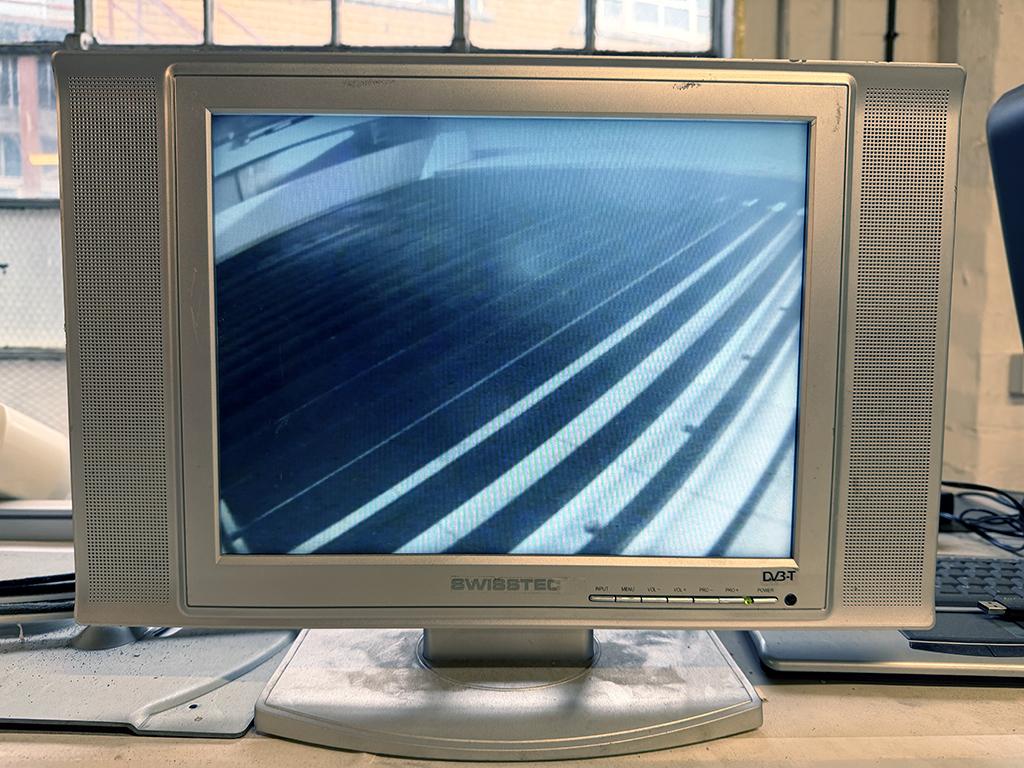
- Switch on the camera monitor

- Insert the Safety Key and turn it to the on position - you will be told where the key is kept during your training

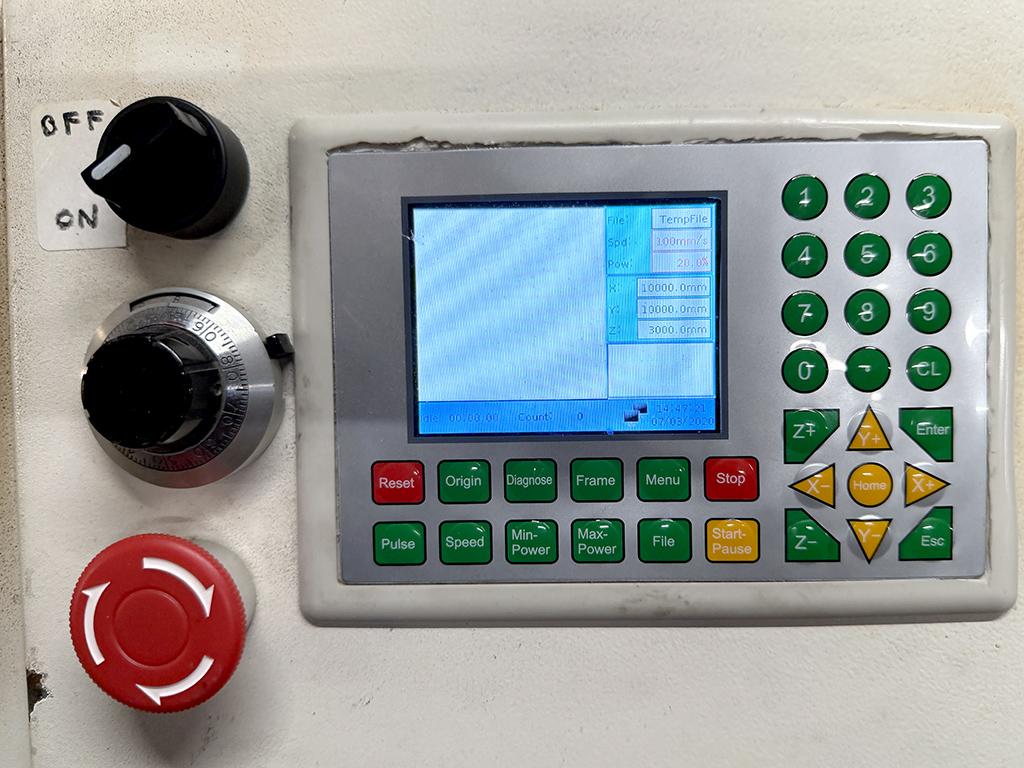
- Switch on the laser using the main dial switch and wait for the screen to finish booting

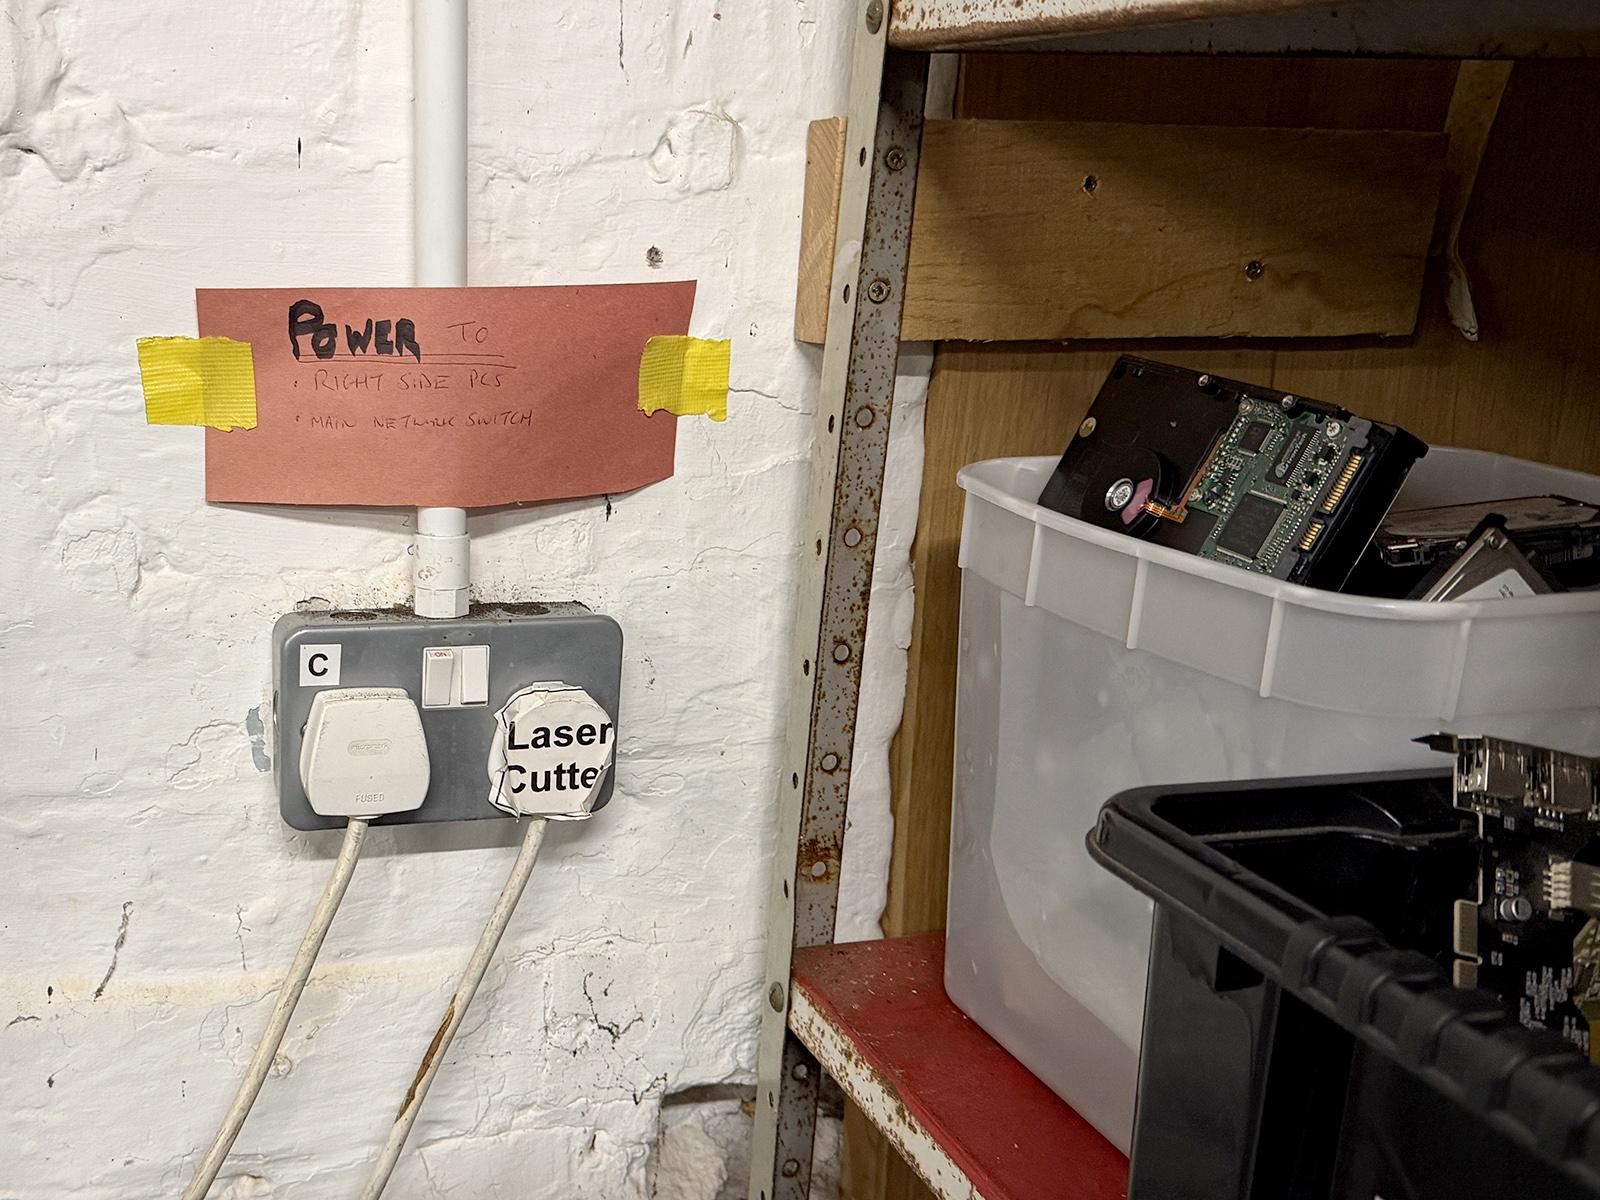
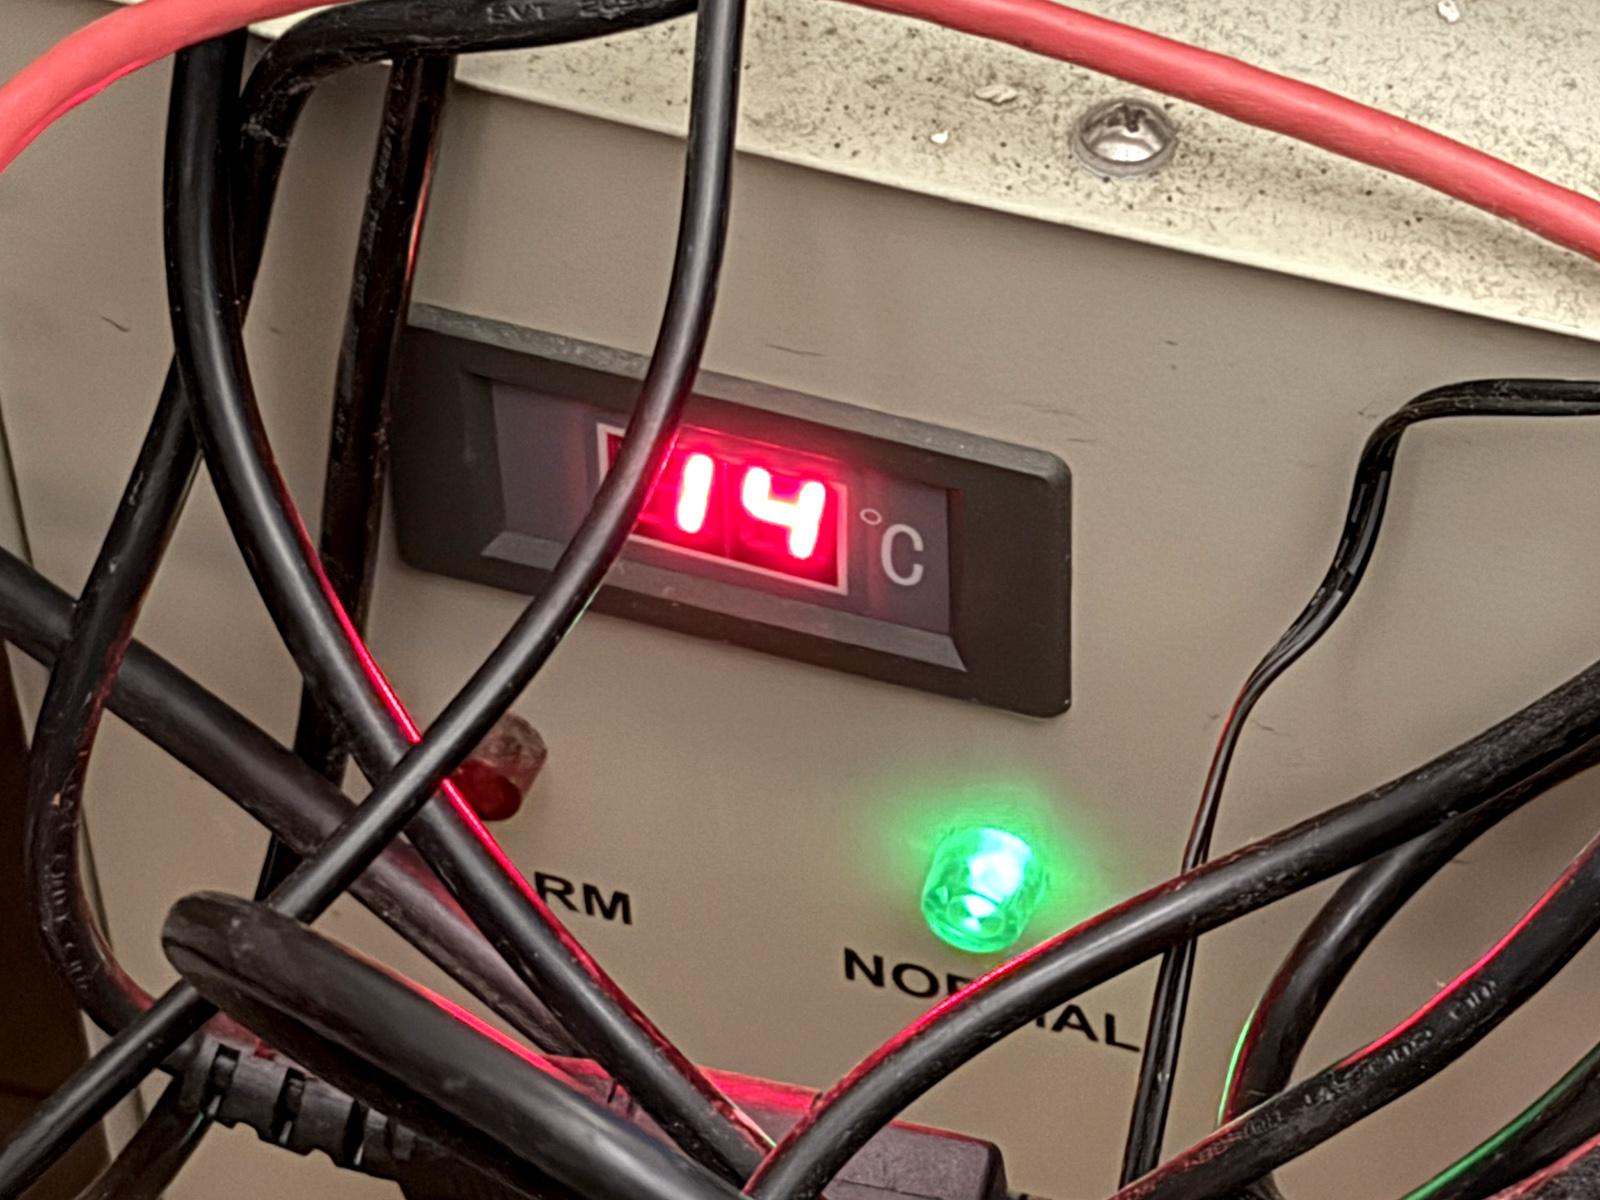
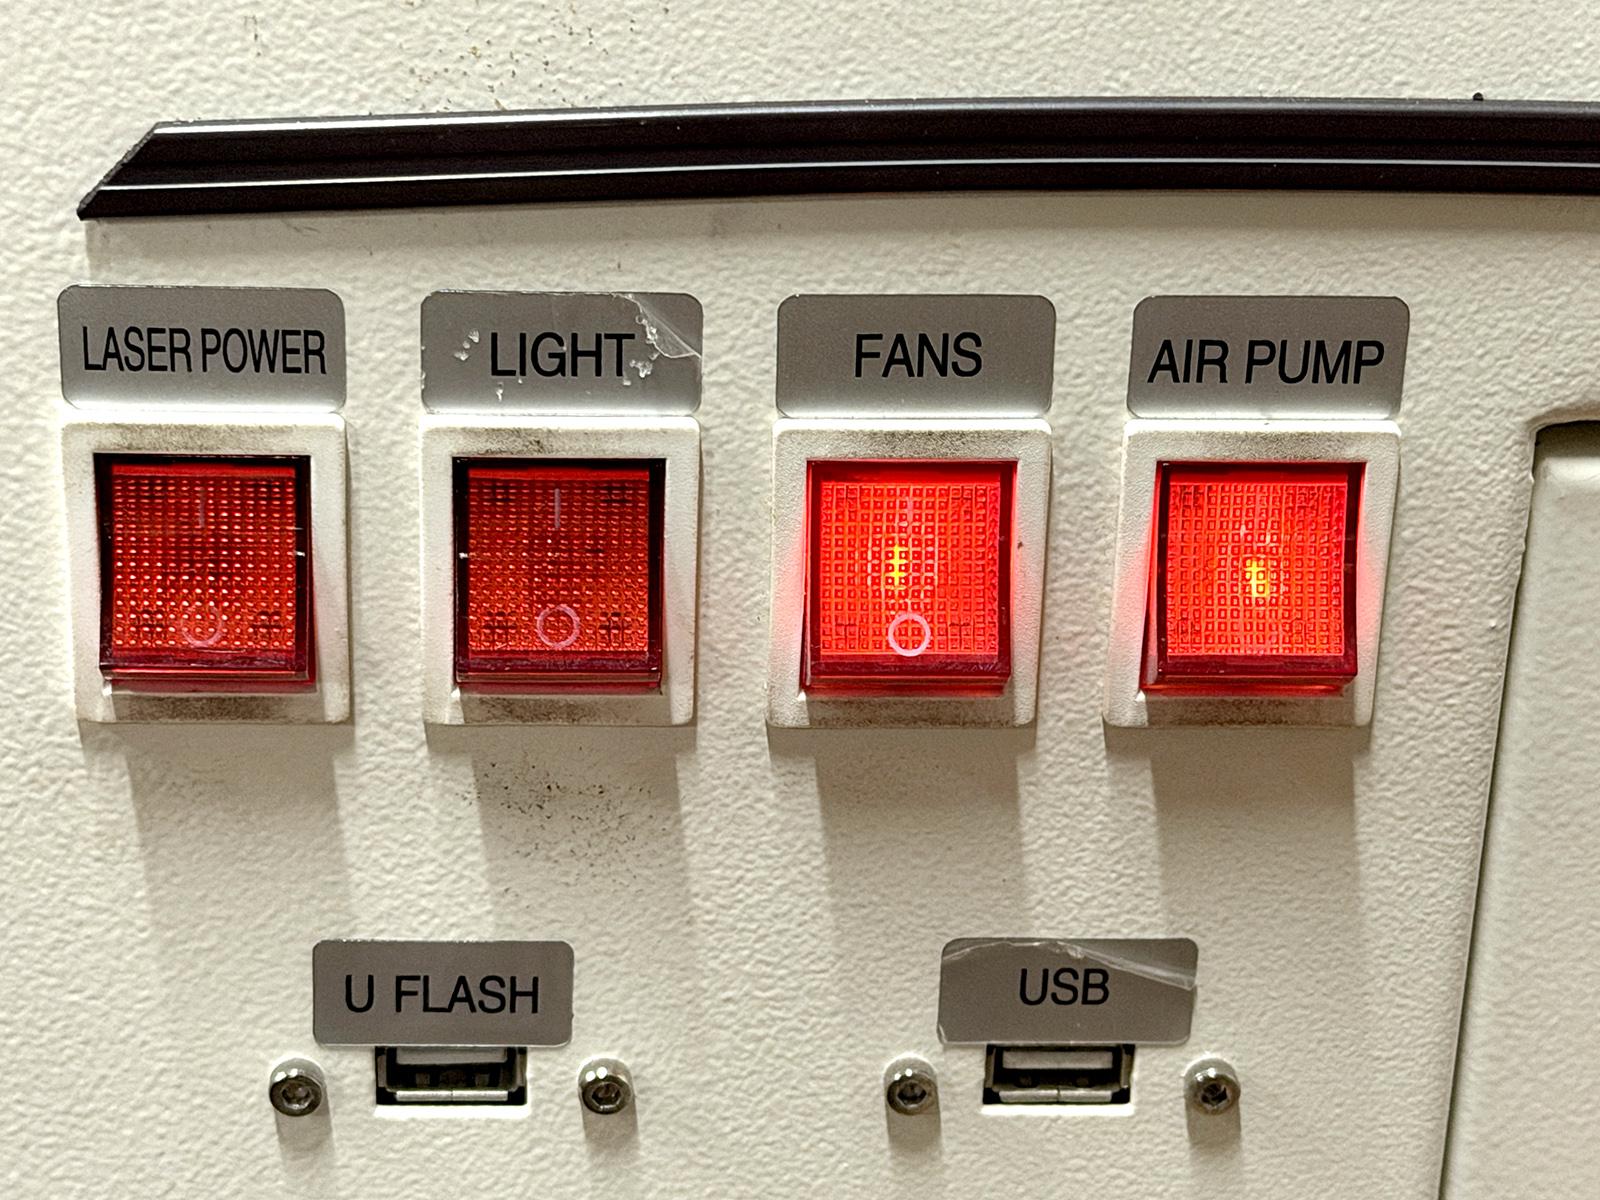
✅ Pre-use checks
- Ensure the bed is clear of debris
- Ensure the blades and bed are clean to reduce flashback*
- Check the air quality monitor is green (see health and safety guidance)
- Check that nothing is obstructing the extraction vents at the rear of the laser bed

- Check that the air assist tube is pointing to the rear of the laser so that it does not bang against the side wall when the laser head homes


- Make sure there is no obvious damage to the laser head, gantry or slats
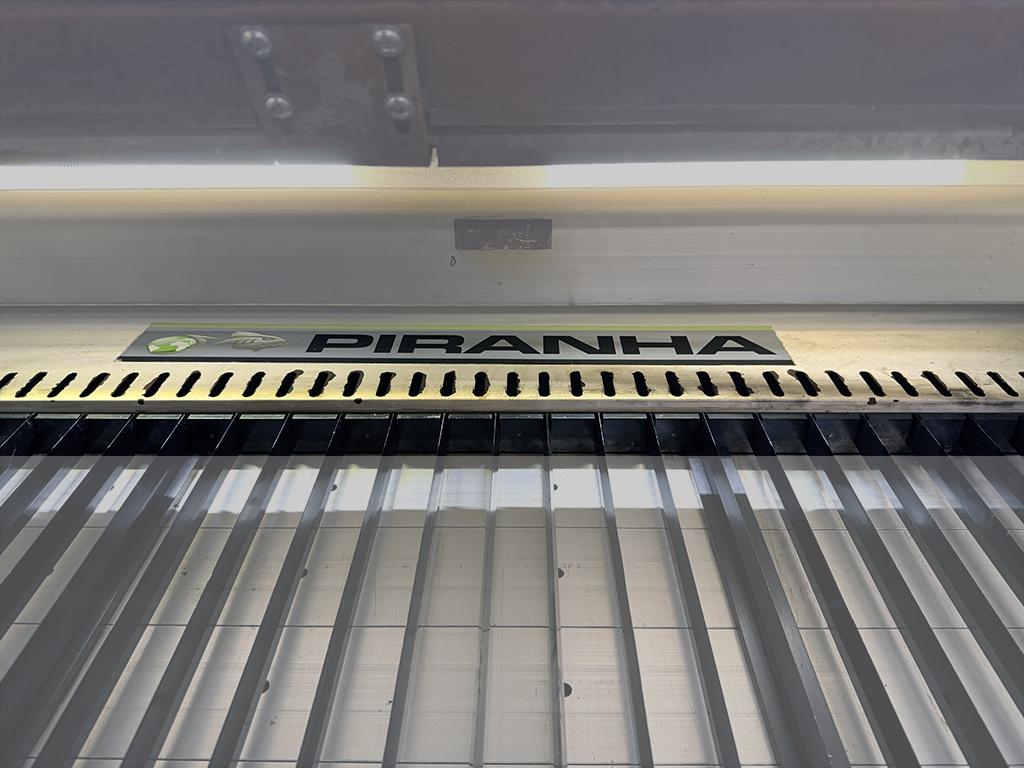
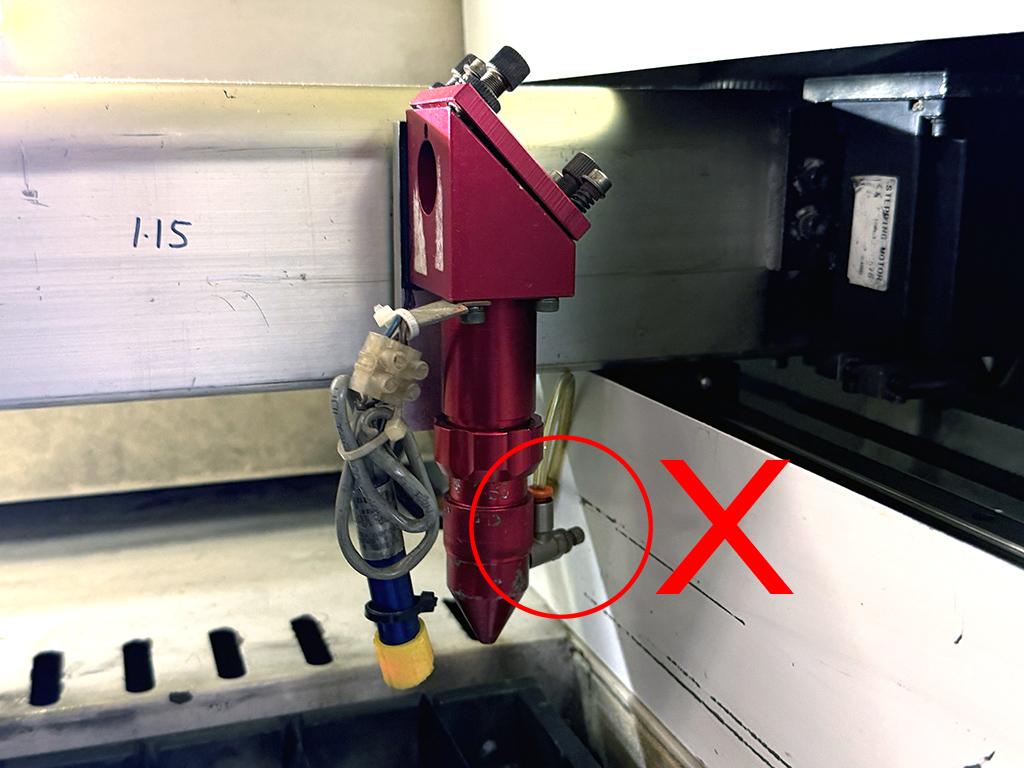
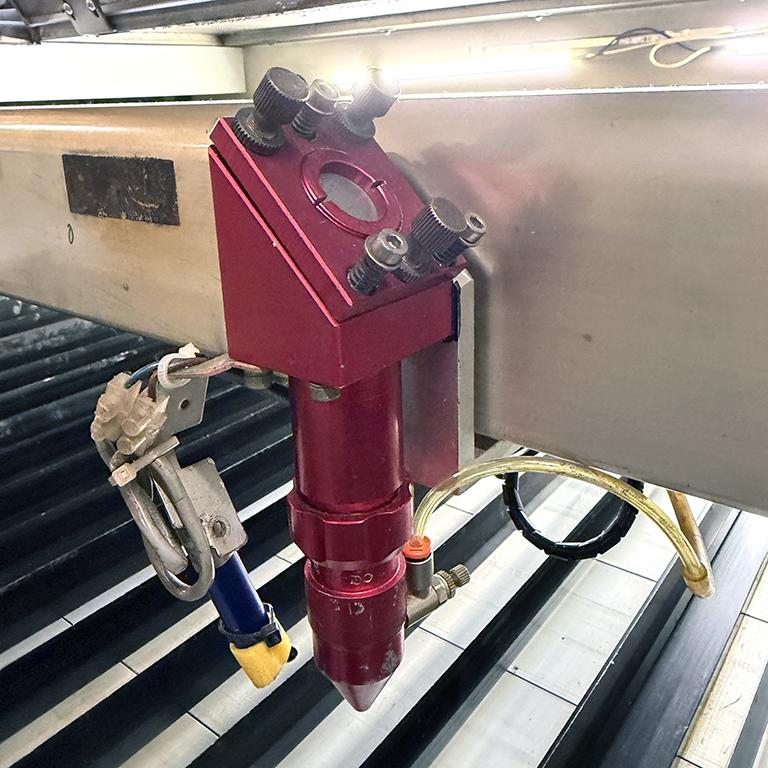
Flashback: The marking or scorching that occurs on the underside of a laser-cut material when the laser beam reflects off the bed or slats and burns the surface again. It is more likely when the bed is dirty or reflective.
🎯 Homing the laser
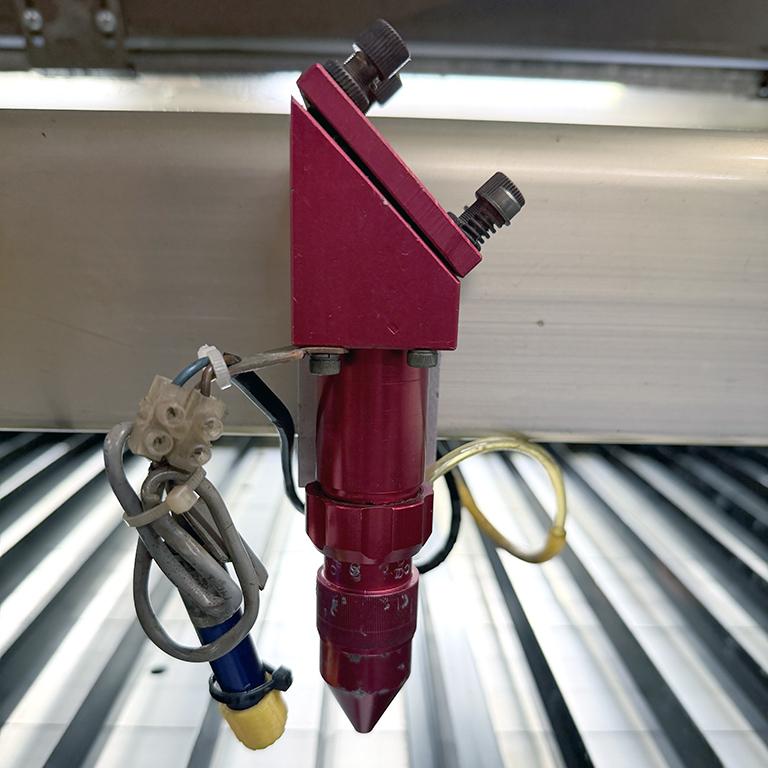
- Make sure the red lens focus tube is raised and fixed in place. Don't forget that the tightener screws the opposite way to normal, and that you must support the bottom part of the tube so that it doesn't drop out.

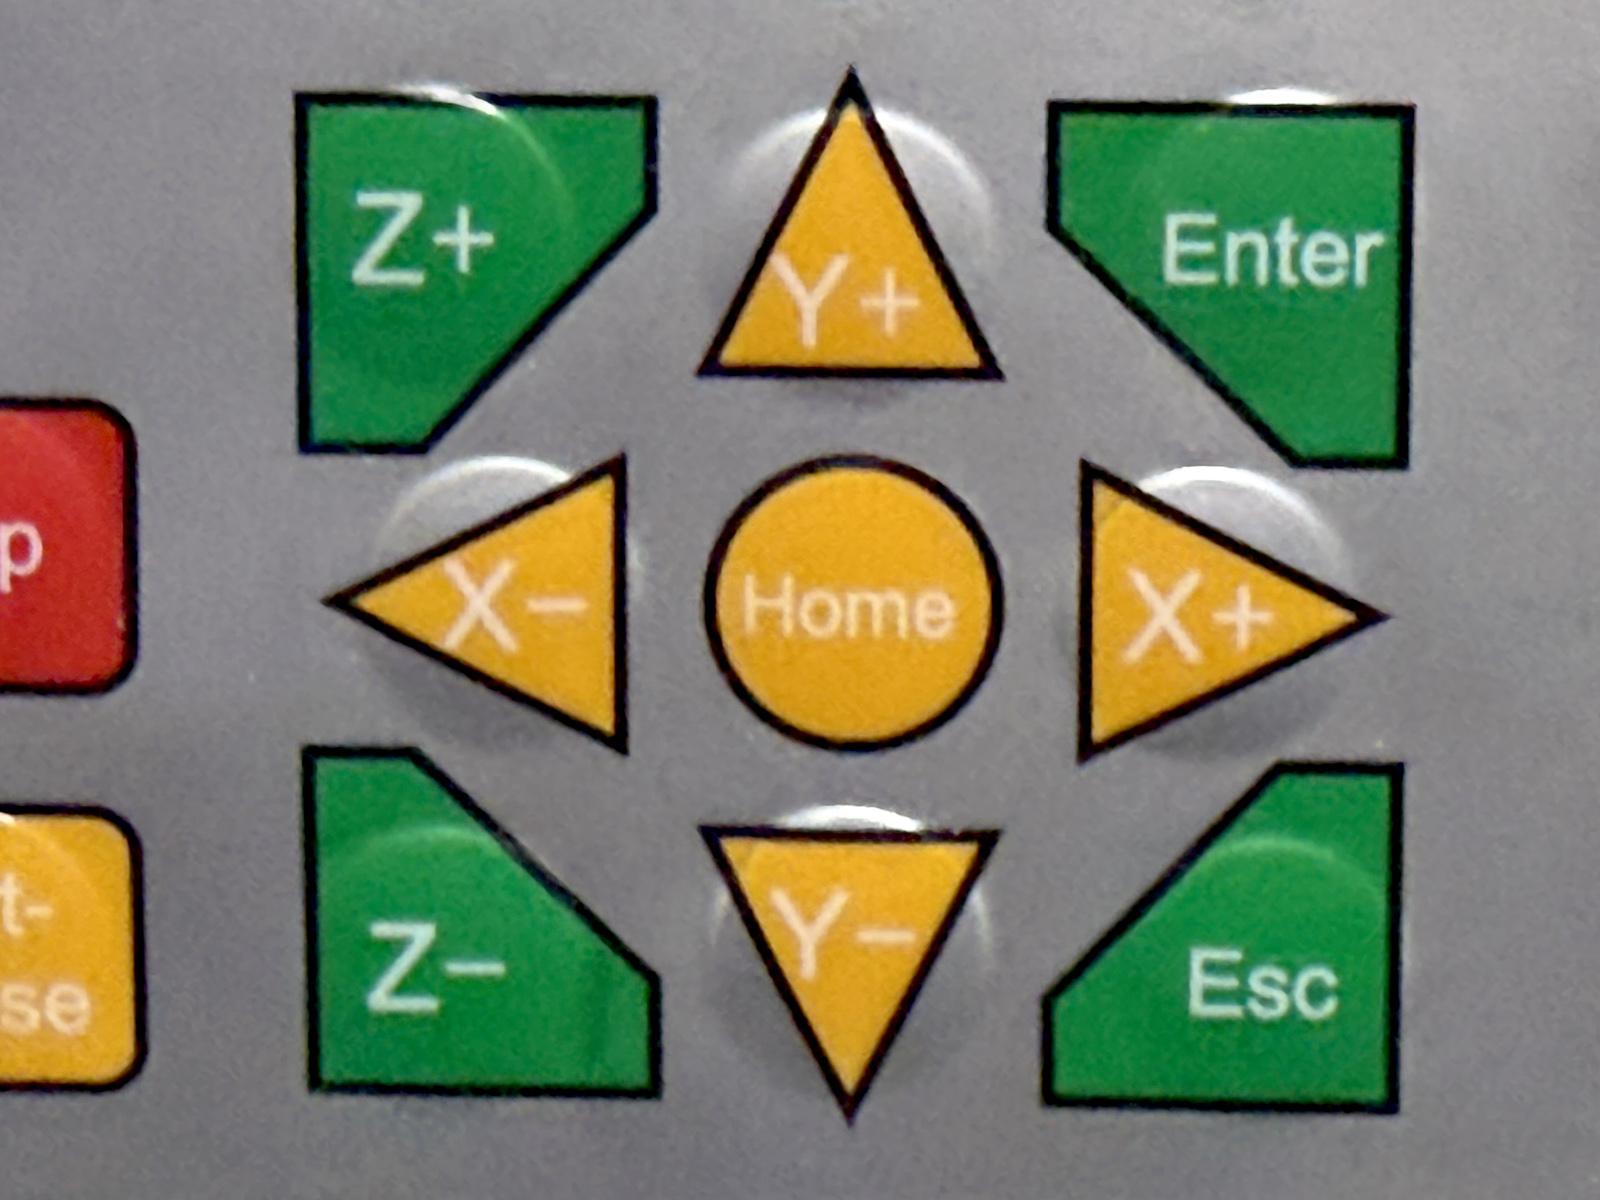
- On the laser panel, press the yellow home button (centre of arrows)

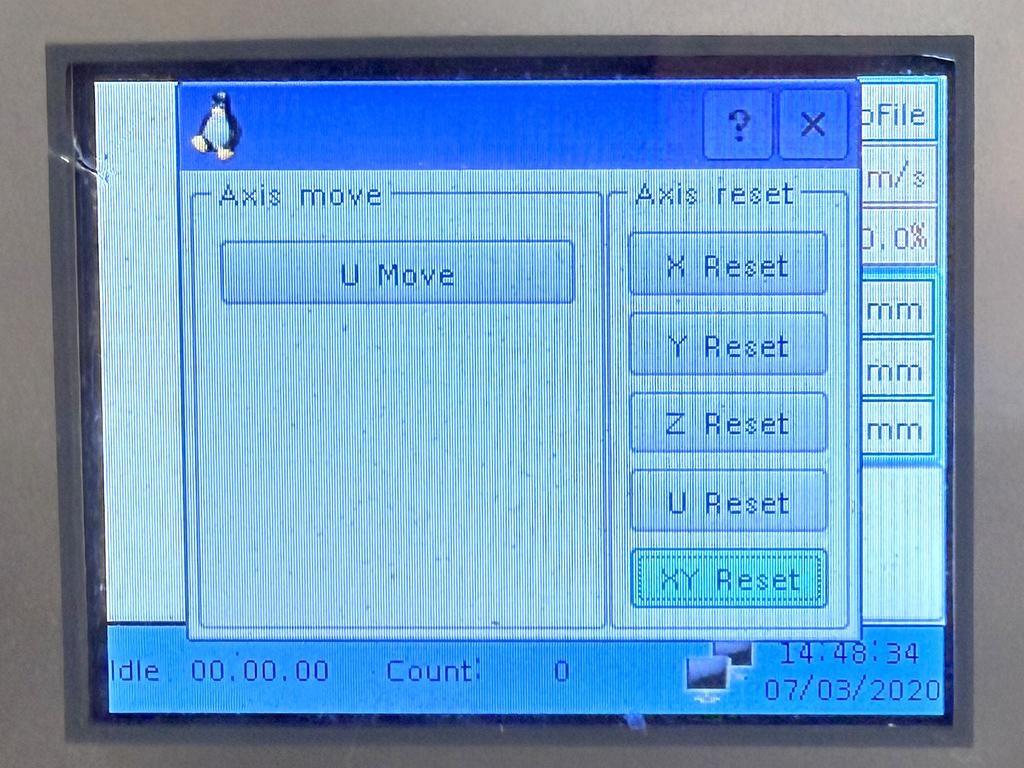
- Press the Y-/down arrow key until you have selected XY Reset button and press Enter on the panel. The gantry will move side to side, forward and back, and then finish in the back right corner of the laser.

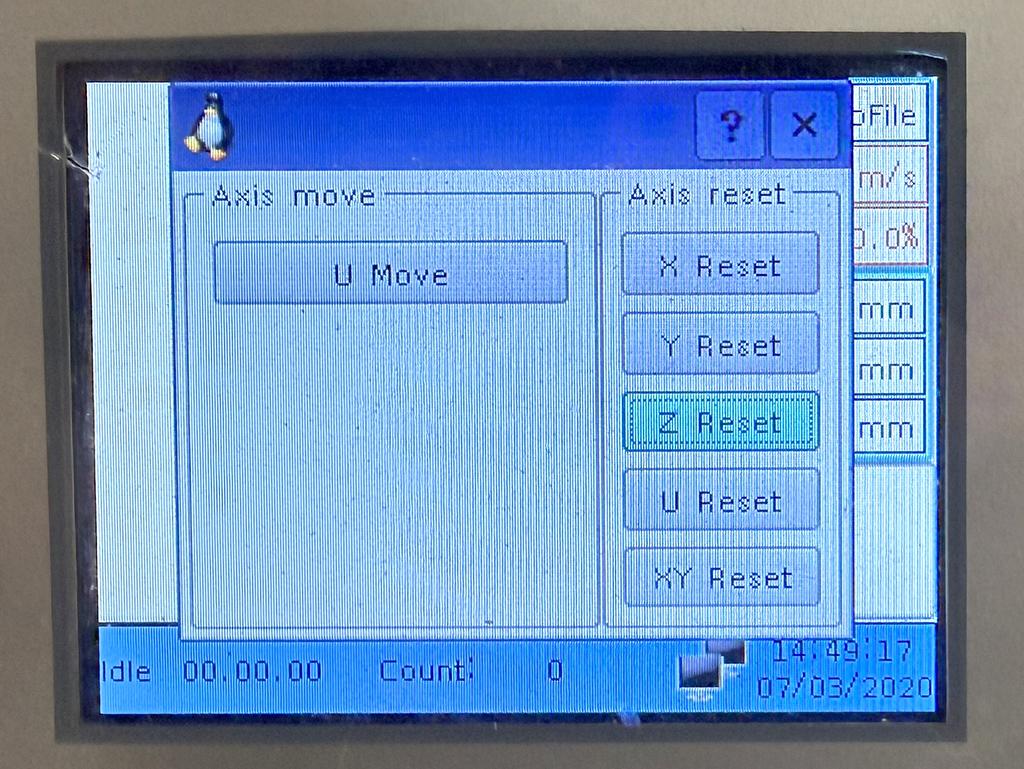
- Repeat the process, this time selecting the Z Reset button. The bed will move up and down.

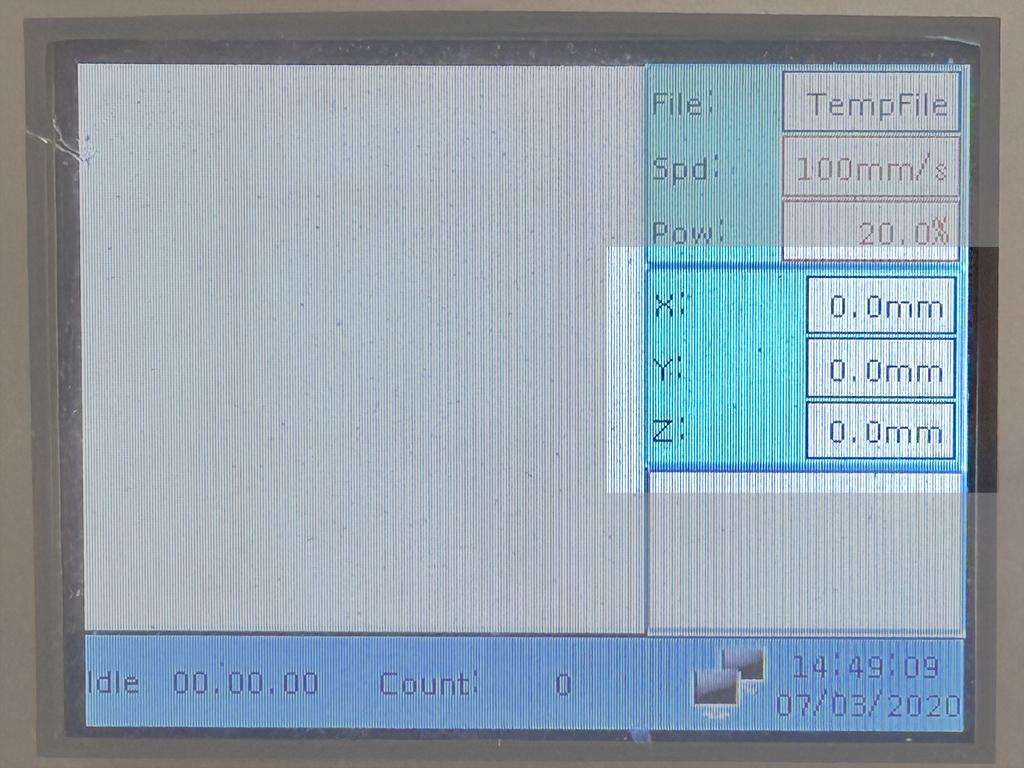
- The panel should now read 0.0mm for the X, Y and Z axes

🔎 Focusing
🏁 After you've finished
❌ Shutting down the laser
🛠️ Maintenance
How to maintain the laser and who should be doing it
🧹 General cleaning
After each use
- Remove all debris from the laser bed
- Clean the blades and laser bed using the wipes provided (usually kept behind the laser machine)
- Wipe down the camera pod
- Tidy the area around the laser machine
- Ensure the focus block is returned to the yellow box under the laser
⚠️ Specialist cleaning
This should only be undertaken by an authorised person: currently, Keith, Divya or Neil.
Cleaning the lens
📏 Alignment
Instructions for authorised users only
👨🔧 Replacing parts
👤 Contacts
For matters relating to the laser, it's best to speak with Divya or Neil, or use the #laser-cutter channel on Discord.